 Save to Pinterest
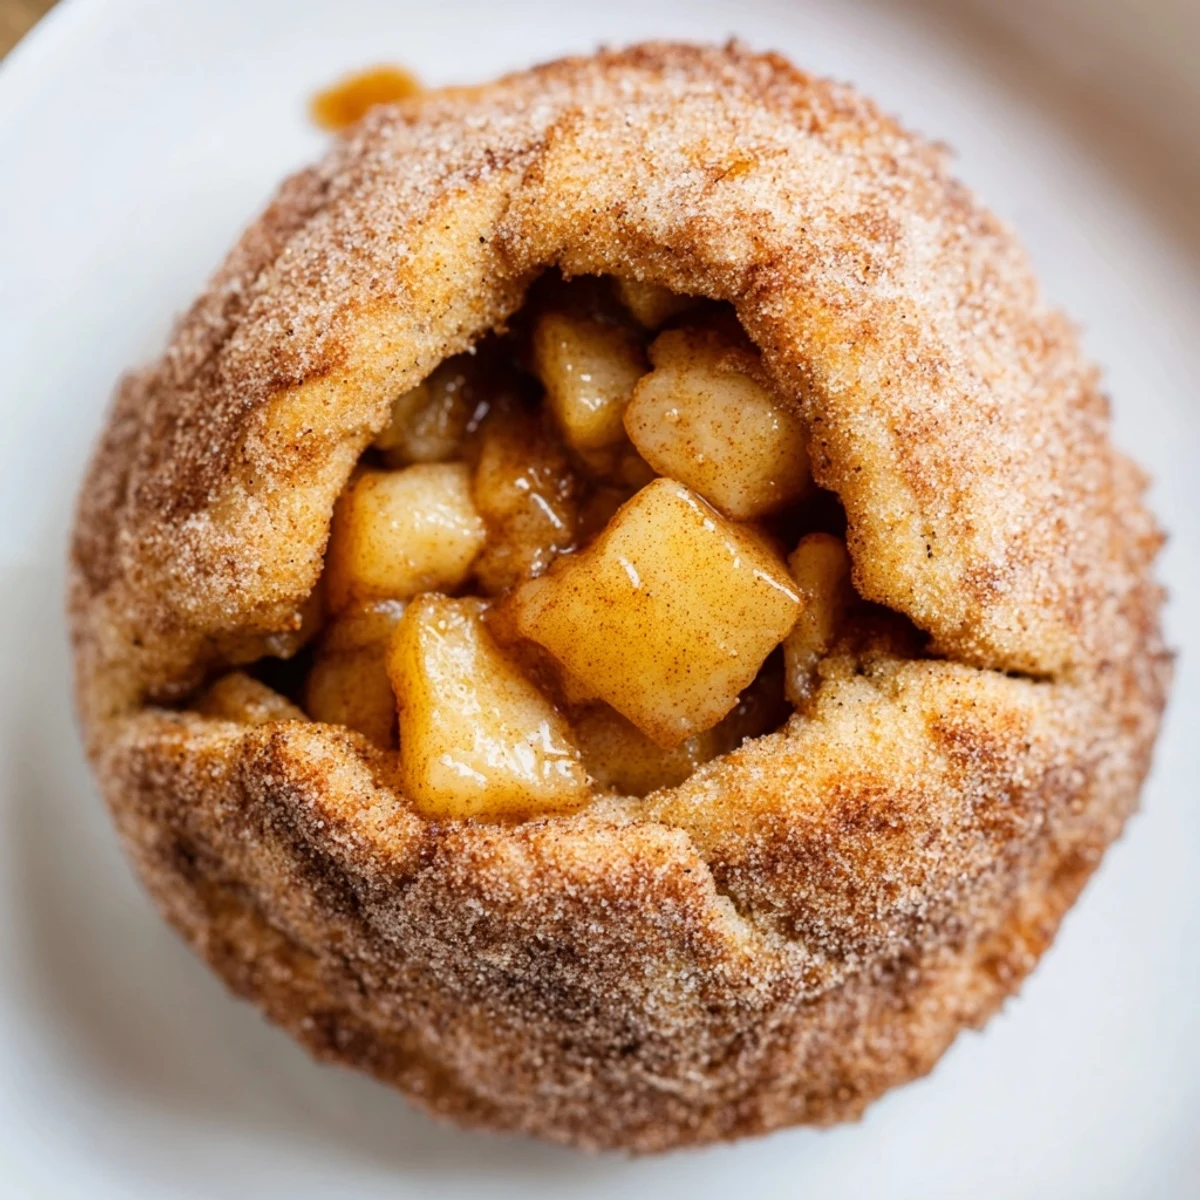
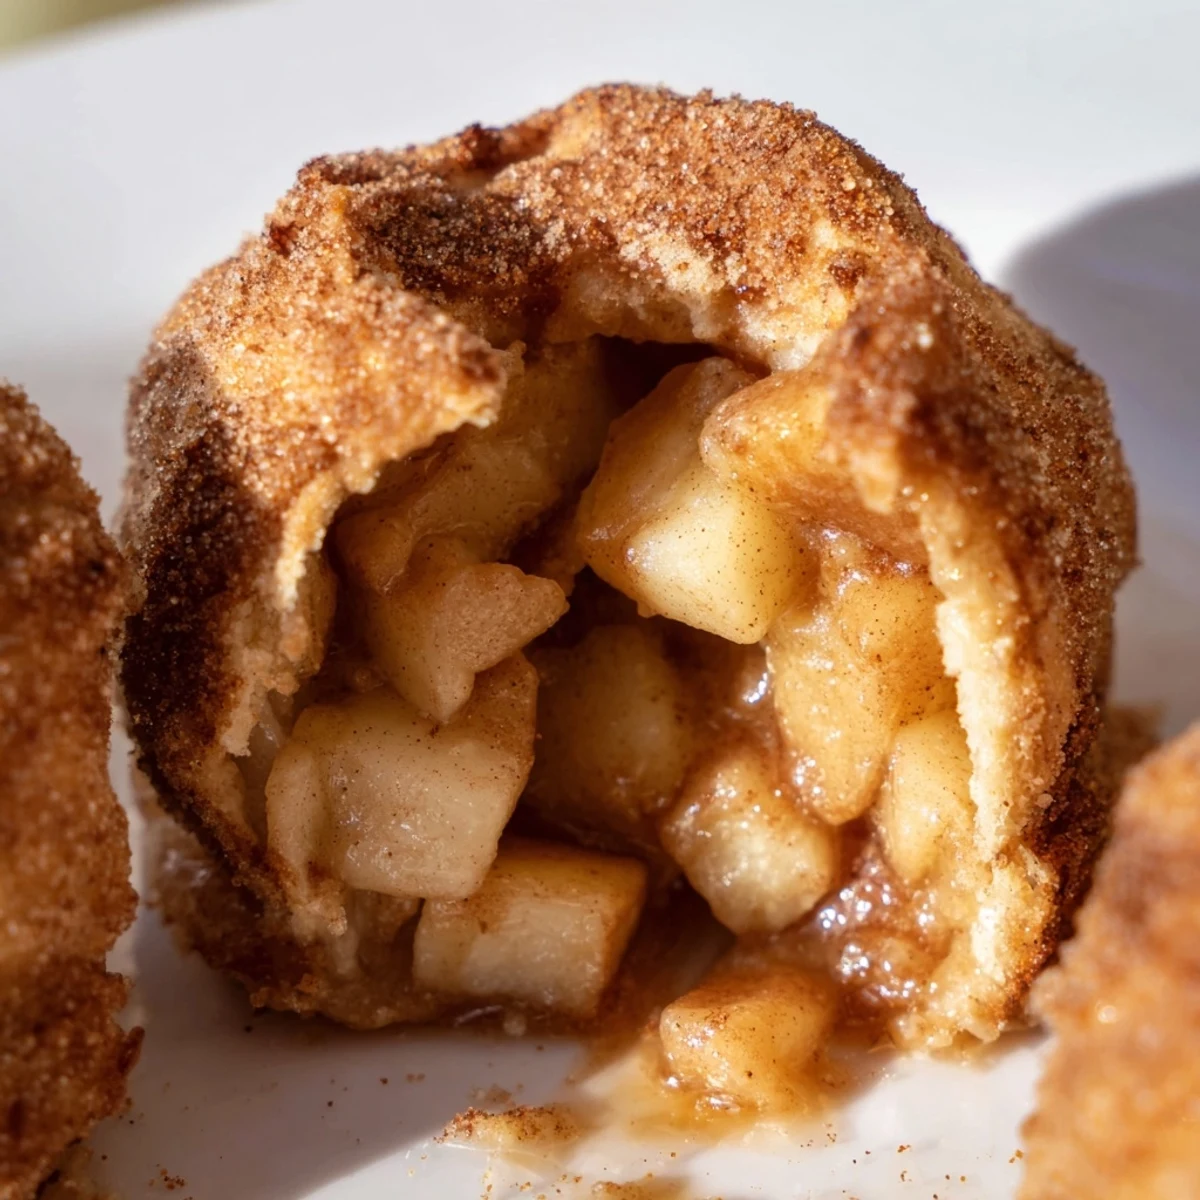
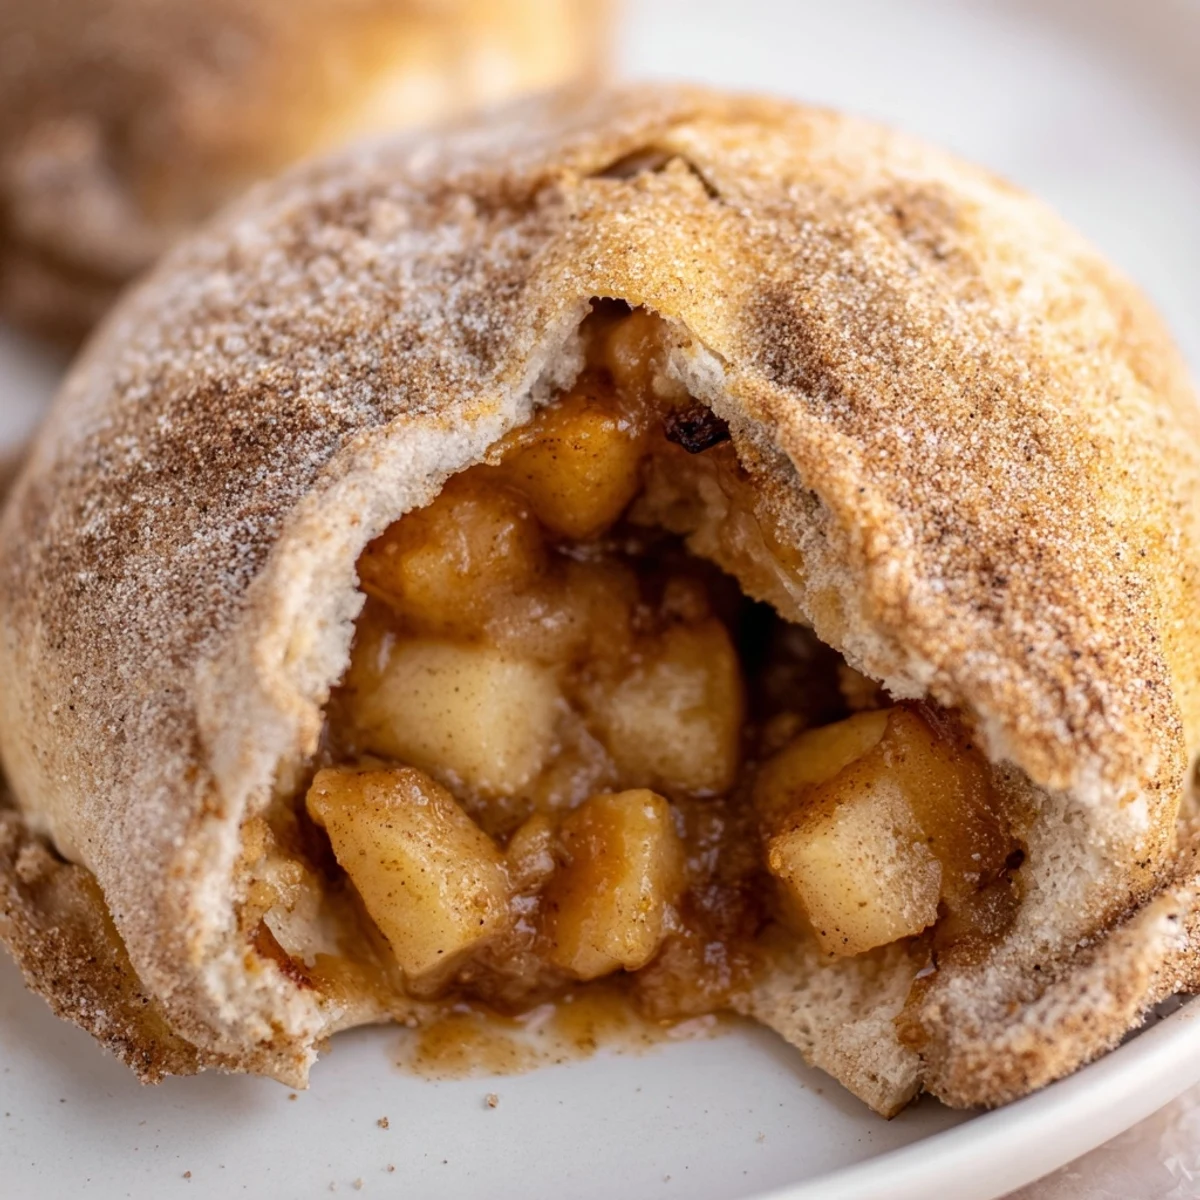
 These handheld treats start with refrigerated biscuit dough flattened and filled with tender cinnamon-spiced apples. Each pocket gets a surprise caramel candy center that melts into gooey goodness during baking. After sealing the dough around the filling, brush with melted butter and coat generously with cinnamon-sugar for that classic bakery finish.
The result is a batch of golden, puffed pastries with crispy exteriors giving way to warm, fruit-filled centers. The caramel creates pockets of sweetness throughout while the apples provide texture and familiar spice flavors. Best served warm when the caramel is still wonderfully melted and the biscuit is at its fluffiest.
Ready from start to finish in just 40 minutes, these are perfect for last-minute desserts, afternoon snacks, or whenever you want something warm and comforting without spending hours in the kitchen.
The kitchen smelled like autumn the first time I made these—warm cinnamon and bubbling caramel taking over the entire house. My husband wandered in, drawn by the scent like a cartoon character floating toward pie on a windowsill. We ended up eating half of them standing right by the cooling rack, burning our fingers but not caring one bit.
I made these for my book club last fall and watched three grown women literally moan over their first bite. Now they request them every single month, and Ive started keeping a stash of caramel candies in the pantry just in case.
Ingredients
- 2 medium apples: Granny Smith holds its shape beautifully but Honeycrisp adds natural sweetness if you prefer less sugar
- 2 tbsp unsalted butter: Use real butter here—the flavor carries through the entire filling
- 2 tbsp brown sugar: Dark brown sugar adds a lovely molasses depth that pairs perfectly with cinnamon
- 1 tsp ground cinnamon: Dont be shy with the cinnamon—it needs to stand up to the rich caramel
- Pinch of salt: This tiny amount makes all the difference in balancing the sweetness
- 12 soft caramel candies: Kraft caramels work perfectly but any soft caramel unwrapped will do
- 1 can refrigerated biscuit dough: The large flaky biscuits create the best texture, though crescent dough works in a pinch
- 3 tbsp unsalted butter melted: Get this nice and warm so it brushes evenly over the dough
- 1/3 cup granulated sugar: Creates that beautiful crunchy exterior everyone fights over
- 1 tsp ground cinnamon: This second dose of cinnamon on the outside creates that classic apple pie profile
Instructions
- Preheat and prep your workspace:
- Set your oven to 350°F and line a baking sheet with parchment paper—trust me, youll thank yourself later when caramel escapes.
- Prepare the spiced apple filling:
- Melt butter in a small skillet over medium heat, then add diced apples, brown sugar, cinnamon and salt. Cook for 4–5 minutes until the apples are tender and coated in a glossy syrup, then set aside to cool slightly.
- Flatten the biscuit dough:
- Separate the biscuits and use your fingers to gently press each into a 4-inch circle, working from the center outward.
- Fill each dough circle:
- Place about 1 tablespoon of cooled apple mixture in the center of each circle, then nestle one caramel candy right on top.
- Seal the pie bombs:
- Gather the edges of the dough around the filling and pinch firmly to seal, forming a ball. Place seam side down on your prepared baking sheet.
- Brush with melted butter:
- Use a pastry brush to coat each pie bomb generously with melted butter—this helps the cinnamon sugar stick and creates golden color.
- Add the cinnamon sugar coating:
- Stir together the granulated sugar and cinnamon in a small bowl, then sprinkle generously over each buttered pie bomb.
- Bake until golden:
- Bake for 15–20 minutes until the bombs are puffed, golden brown, and you can see caramel bubbling through any small gaps.
- Cool before serving:
- Let them rest for at least 5 minutes because that caramel turns into literal lava in the oven.
 Save to Pinterest
 My daughter now requests these for her birthday instead of cake, which I consider the highest compliment imaginable. Something about that surprise caramel center makes people feel like kids again.
Making Them Ahead
You can assemble the pie bombs up to 24 hours in advance and keep them covered in the refrigerator. Brush with butter and add the cinnamon sugar coating right before baking, otherwise the sugar gets soggy overnight.
Dough Variations
Pizza dough creates a chewier, breadier texture while crescent dough makes lighter, flakier bombs. Ive even used leftover pie dough scraps when I had them—the filling works with almost any vehicle.
Serving Suggestions
These shine alongside vanilla ice cream, especially if you serve them slightly warm so the ice cream starts melting into all those crevices. A drizzle of extra caramel sauce never hurt anyone either.
- Set up a topping bar with nuts, sprinkles or sea salt for fun parties
- Package individually in cellophane bags for adorable party favors
- Reheat leftovers for 10 seconds in the microwave to restore that gooey center
 Save to Pinterest
 Every time I make these now, I think about how something so simple can bring so much joy to a regular Tuesday evening.
Recipe Questions & Answers
- → Can I use fresh apples instead of cooking them first?
-
Cooking the apples first ensures they're tender and infused with cinnamon flavor. Raw apples would remain crunchy and might release too much moisture during baking, potentially making the dough soggy. The quick sauté step takes just 5 minutes and makes a significant difference in the final texture.
- → What other dough options work well?
-
While refrigerated biscuit dough creates the fluffiest results, you can successfully use crescent roll dough for a slightly lighter texture, or pizza dough for a chewier, bread-like consistency. Each option will still seal properly around the filling and bake up golden brown.
- → How do I prevent the caramel from leaking during baking?
-
The key is pinching the dough seams thoroughly to create a tight seal. Place the bombs seam-side down on the baking sheet, which helps the seal stay secure. Also avoid overfilling—1 tablespoon of apples plus one caramel is the perfect amount. Some caramel might still bubble through, which is completely normal and adds to the rustic appeal.
- → Can these be made ahead and reheated?
-
These are best served fresh from the oven while the caramel is still molten and the biscuit is at its fluffiest. However, you can store cooled leftovers in an airtight container for up to 2 days and reheat in a 350°F oven for 5-8 minutes. The microwave works too, though the exterior won't regain its crispness.
- → What's the best way to serve these?
-
Warm is ideal, either plain or with accompaniments. Vanilla ice cream creates a lovely temperature contrast, while additional caramel sauce amplifies the gooey factor. They're also delightful alongside a cup of coffee or as part of a dessert spread with other sweet treats.
- → Can I freeze the unbaked bombs?
-
Yes! Assemble completely through the coating step, then arrange on a baking sheet and freeze until solid. Transfer to a freezer bag for up to 3 months. Bake from frozen, adding 2-3 minutes to the baking time. This makes them excellent for having homemade treats ready whenever the craving strikes.
