 Save to Pinterest
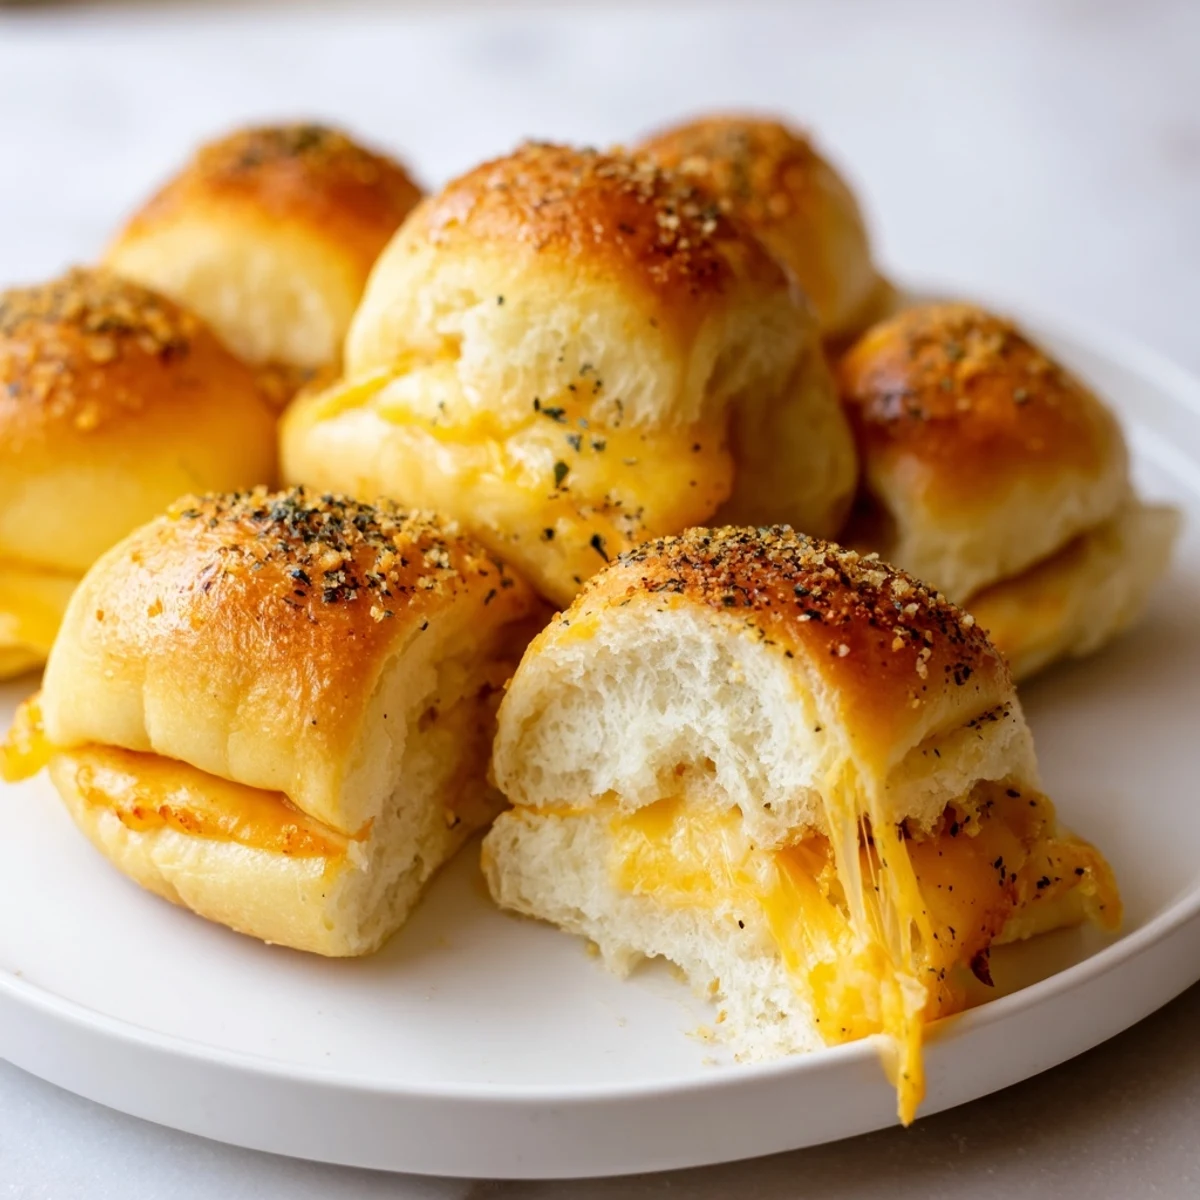
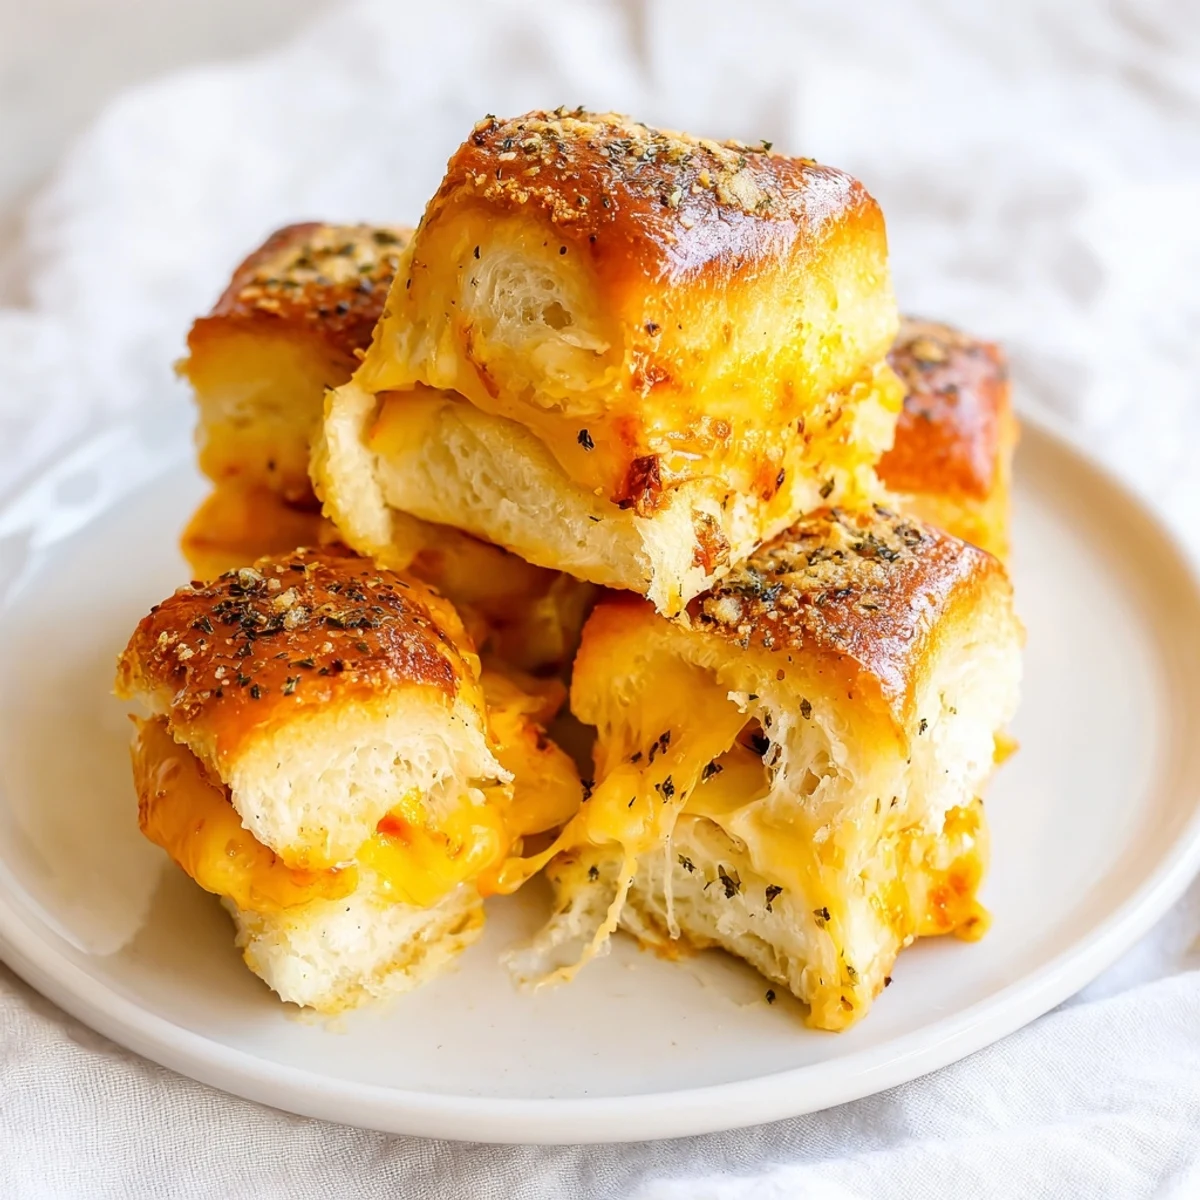
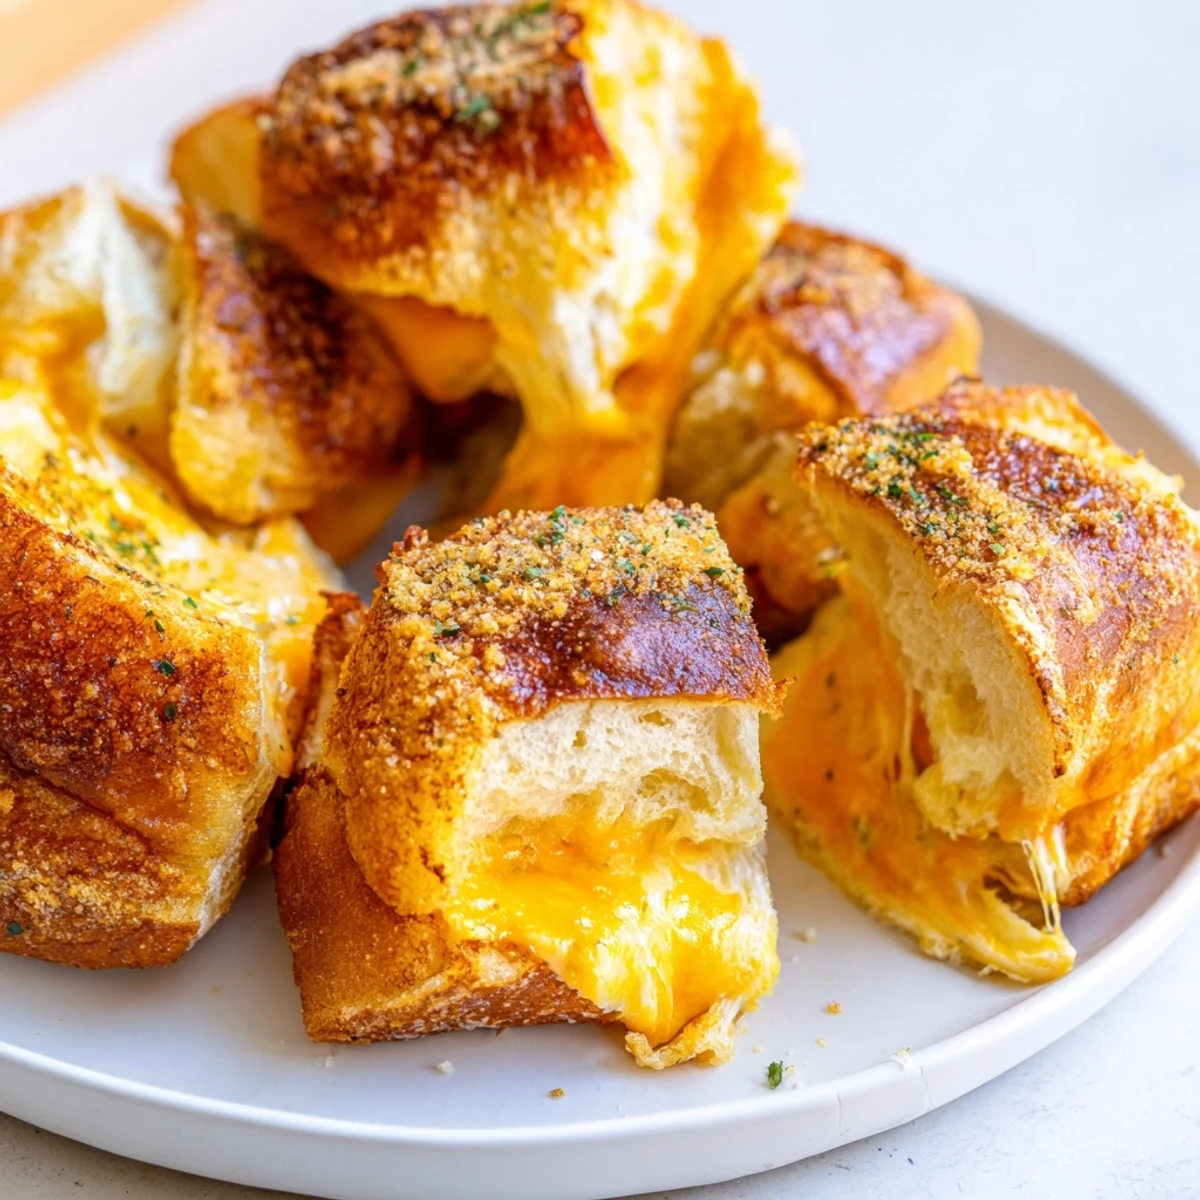
 These bite-sized sandwiches transform Hawaiian sweet rolls into irresistible finger food by slicing the entire roll package horizontally, layering with sharp cheddar cheese, and brushing with melted butter seasoned with garlic powder and parsley. After 15 minutes in the oven, the rolls emerge golden brown with perfectly melted cheese creating that ideal pull-apart texture everyone loves.
The natural sweetness of Hawaiian rolls balances beautifully with savory cheddar, while the optional Dijon-mayo spread adds tangy depth. These disappear quickly at parties and make excellent after-school snacks or game day fare.
The first time I made these for a Super Bowl party, they disappeared in under five minutes and I've been asked to bring them to every gathering since. Something magical happens when the natural sweetness of Hawaiian rolls meets sharp cheddar and that golden buttery top.
Last winter my daughter had three friends over for a sleepover and I made a batch for their midnight snack. The way they all crowded around the kitchen island, waiting for that foil to come off, made me realize the simple joy of warm cheesy bread is universal.
Ingredients
- Hawaiian sweet rolls: The sweetness is key here and really balances the sharp cheddar, plus they stay connected so you can slice them all at once
- Cheddar cheese: I buy the block and slice it myself because pre-sliced cheese sometimes has that weird plasticky texture that doesnt melt quite right
- Unsalted butter: Melted butter gives you that gorgeous golden color and helps the garlic and parsley stick to the top
- Dijon mustard: This little kick cuts through all that richness and somehow makes everything taste more grown up
- Garlic powder: Not fresh garlic here because the powder distributes more evenly and wont burn in the oven
Instructions
- Get your oven ready:
- Preheat to 350°F and line a baking sheet with parchment paper because that melted cheese will try to escape and parchment saves you from scrubbing later
- Prep the rolls:
- Keep all those little rolls connected and slice through the entire package horizontally so you have one big slab of tops and one big slab of bottoms
- Add some flavor:
- Whisk that mustard and mayo together if you're using it and spread it on both cut sides, it creates this subtle tang that really elevates things
- Layer the cheese:
- Pile your cheddar slices onto the bottom half, overlapping slightly to cover every square inch, then press that top half back down like you're making a giant sandwich puzzle
- Butter them up:
- Brush melted butter all over the top surface and sprinkle with garlic powder and parsley, the butter helps everything brown beautifully
- Bake covered then uncovered:
- Tent loosely with foil and bake 10 minutes to melt everything through, then remove foil for the last 5 minutes to get that gorgeous golden crust everyone will fight over
- The final step:
- Let them rest for exactly 2 minutes so the cheese sets slightly, then use a serrated knife to cut between each roll into individual sandwiches
 Save to Pinterest
 My neighbor smelled these baking through our open kitchen window and showed up with an empty plate asking what I was making. Now we have a standing arrangement where I bring over a batch whenever I fire up the oven.
Make Them Your Own
I've discovered that adding a thin layer of raspberry jam on the bottom bun before the cheese creates this insane sweet and savory situation. My husband was skeptical but now requests it that way every single time.
Perfect Pairings
These mini sandwiches are substantial enough to serve with just a simple green salad dressed lightly with vinaigrette. The acidity cuts right through all that cheese and butter, plus it makes the whole thing feel like an actual meal instead of just appetizers.
Make Ahead Magic
You can assemble the entire thing up to 24 hours ahead and keep it wrapped tightly in the fridge. Add the butter mixture right before baking and nobody will know you did most of the work yesterday.
- Wrap the assembled block tightly in plastic if making ahead
- Brush with butter cold from the fridge, it works fine
- Add fresh parsley after baking if you want it to look extra vibrant
 Save to Pinterest
 There's something deeply satisfying about serving food that makes people's eyes light up like that.
Recipe Questions & Answers
- → Can I make these ahead of time?
-
Yes, assemble the rolls up to 24 hours in advance, cover tightly, and refrigerate. Brush with melted butter just before baking and add a few extra minutes to account for the cold start.
- → What other cheeses work well?
-
Mozzarella creates excellent melt, Swiss adds nutty flavor, pepper jack brings gentle heat, or combine multiple cheeses for extra complexity. Provolone and Gruyère also work wonderfully.
- → How do I store leftovers?
-
Store in an airtight container in the refrigerator for up to 3 days. Reheat in a 350°F oven for 5-7 minutes to restore the crispy top and melted cheese interior.
- → Can I freeze these before baking?
-
Absolutely. Wrap assembled rolls tightly in plastic and foil, freeze for up to 1 month. Thaw overnight in refrigerator, then bake as directed, adding 2-3 minutes if needed.
- → What's the best way to cut the rolls?
-
Use a serrated knife with a gentle sawing motion. Keep the rolls connected as you slice through the entire package horizontally, creating one large top and bottom layer for easier assembly.
- → Can I add meat to make them more substantial?
-
Cooked bacon, ham, or turkey slices layer beautifully between the cheese. Just keep layers thin to ensure proper heating through all ingredients.
