 Save to Pinterest
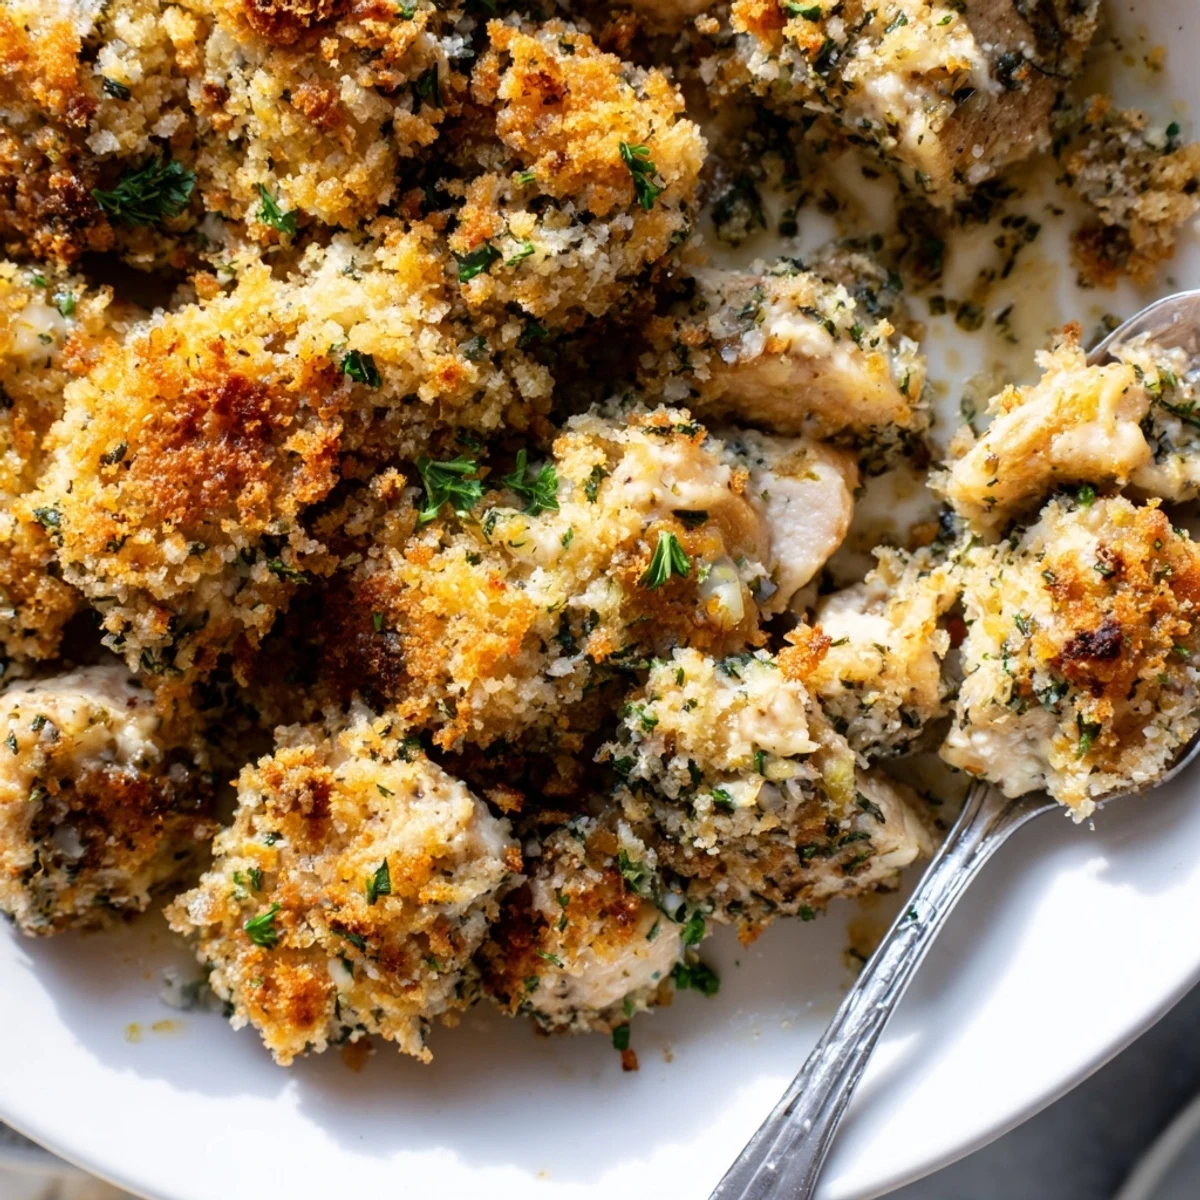
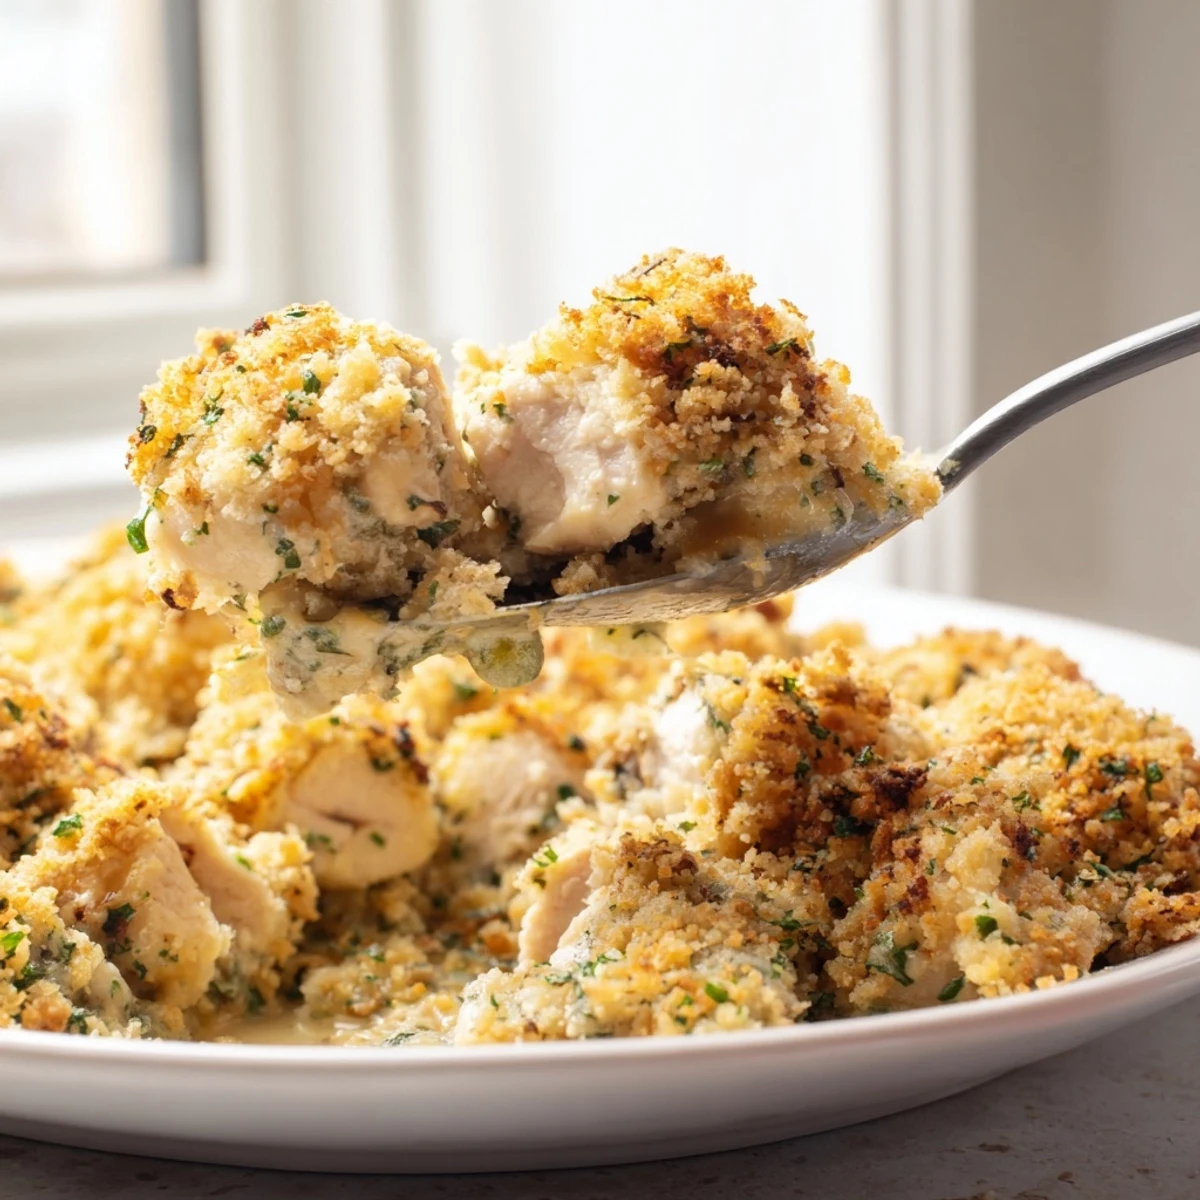
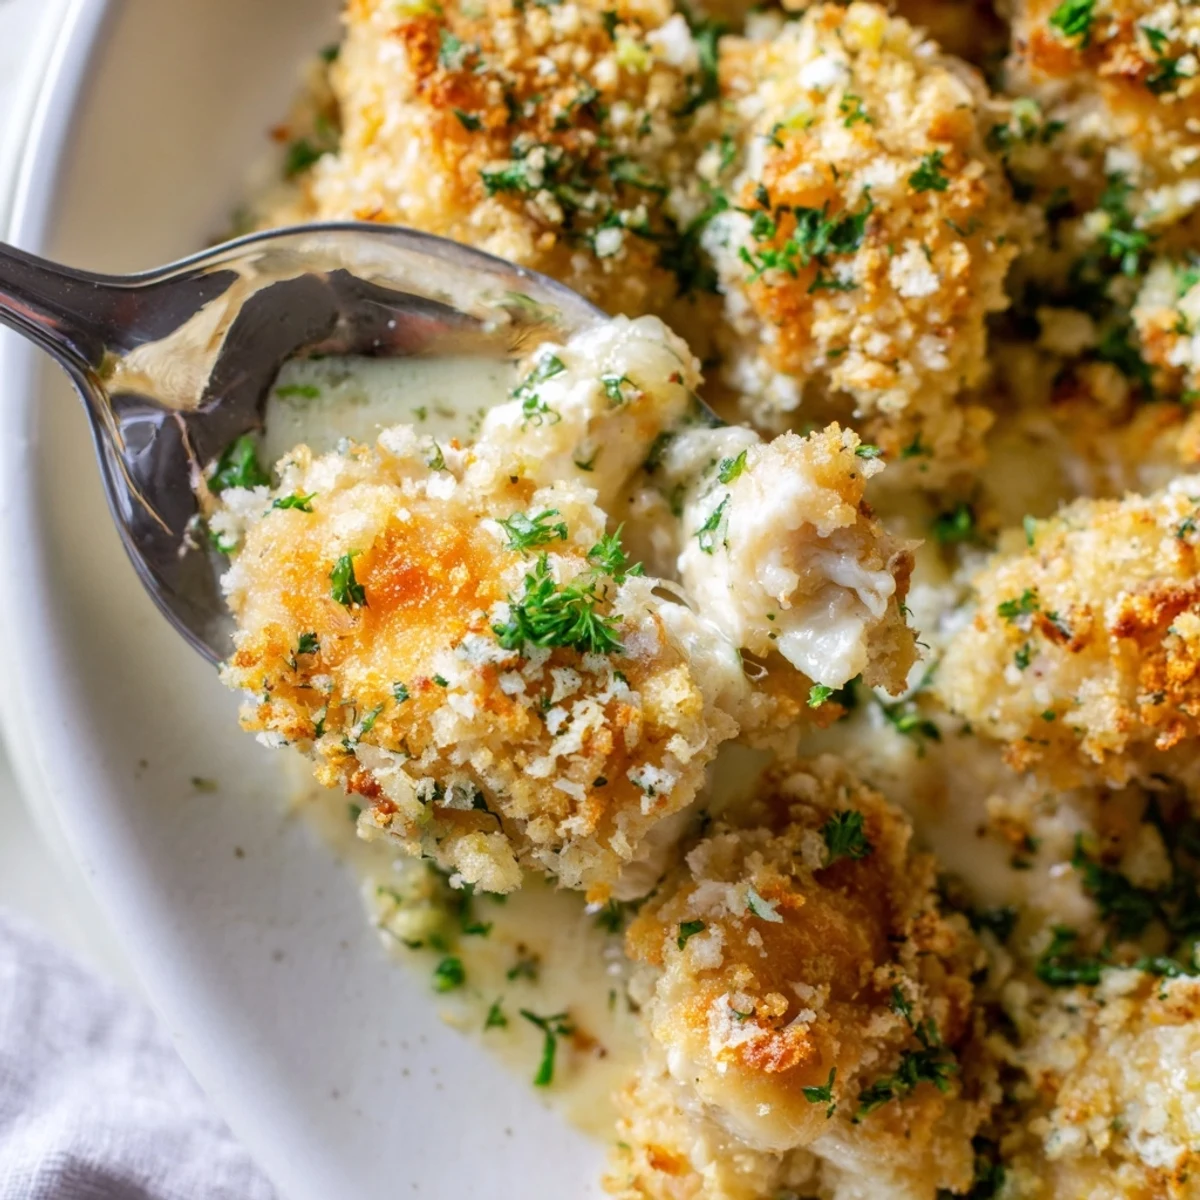
 This Chicken Kiev Casserole transforms the beloved Eastern European classic into an effortless one-pan bake. Tender pieces of sautéed chicken breast are smothered in a rich garlic-herb butter sauce, then crowned with a golden, crispy Parmesan and panko breadcrumb topping.
It captures everything you love about traditional Chicken Kiev — the herb butter, the garlicky richness, the crunchy crust — without the fuss of pounding, rolling, or frying. Perfect for weeknight dinners, it feeds six and reheats beautifully the next day.
The smell of garlic butter hitting a hot pan is the kind of thing that makes everyone wander into the kitchen asking when dinner will be ready. I stumbled onto this deconstructed Chicken Kiev idea during a week when the classic rolled version felt too fussy for a Tuesday. One pan, zero toothpicks, and all the same buttery payoff was all I needed to hear. Now it shows up at my table at least once a month, usually on nights when comfort food is nonnegotiable.
My neighbor stopped by one evening right as I was pulling this from the oven, and she ended up staying for two helpings and a glass of wine on the porch. There is something about a bubbling golden topped dish that dissolves all sense of hurry and makes people want to sit down and stay a while.
Ingredients
- 1.5 lbs boneless skinless chicken breasts, cut into bite sized pieces: Cutting the chicken small helps it cook quickly and soak up more of that buttery sauce.
- 6 tbsp unsalted butter, softened: Softened butter is essential here because it needs to blend smoothly with the garlic and herbs before melting into the sauce.
- 3 garlic cloves, minced: Fresh garlic makes a real difference, so please skip the jarred version for this one.
- 2 tbsp fresh parsley, chopped: Parsley brings a bright freshness that cuts through all the richness.
- 1 tbsp fresh dill, chopped (optional): Dill gives a subtle Eastern European nod that makes this taste authentic.
- 1/2 tsp salt and 1/4 tsp black pepper: Simple seasonings that let the butter and herbs do the heavy lifting.
- 1 tsp lemon juice: Just a squeeze wakes up the entire herb butter mixture.
- 1 cup whole milk: Whole milk creates a velvety sauce, so avoid using skim here.
- 1 cup low sodium chicken broth: Low sodium lets you control the salt level throughout the dish.
- 2 tbsp all purpose flour: This small amount thickens the sauce just enough to coat the chicken beautifully.
- 1 tbsp olive oil: Used for searing the chicken to get that light golden color.
- 1 cup panko breadcrumbs: Panko stays crispier than regular breadcrumbs and gives that satisfying crunch on top.
- 1/4 cup grated Parmesan cheese: Parmesan adds a salty, nutty depth to the topping that regular cheese just cannot match.
- 2 tbsp unsalted butter, melted: This binds the breadcrumb topping together and helps it brown evenly.
- 2 tbsp fresh parsley, chopped (for garnish): A final sprinkle of green makes it look as good as it tastes.
Instructions
- Preheat and prepare the dish:
- Set your oven to 375 degrees F and grease a 9 by 13 inch baking dish so nothing sticks later.
- Make the garlic herb butter:
- In a small bowl, mash together the softened butter, minced garlic, parsley, dill if you are using it, salt, pepper, and lemon juice until everything is evenly combined. Give it a taste because this butter should already smell incredible.
- Sear the chicken:
- Heat olive oil in a large skillet over medium high heat, add the chicken pieces with a light sprinkle of salt and pepper, and cook until just golden on the outside and no longer pink inside, about 5 to 7 minutes. Transfer the chicken into your prepared baking dish.
- Build the sauce:
- In that same skillet, sprinkle in the flour and stir constantly for about a minute to cook off the raw taste. Slowly pour in the milk and broth while whisking to prevent lumps, then let it simmer until it thickens slightly, about 3 to 4 minutes.
- Add the herb butter to the sauce:
- Take the skillet off the heat and drop in your prepared garlic herb butter, whisking until it melts into a smooth, glossy sauce. Pour every last drop over the chicken in the baking dish.
- Top it with breadcrumbs:
- Toss the panko, Parmesan, and melted butter together in a bowl, then scatter the mixture evenly across the top of the casserole. Use your hands if needed to spread it out so every corner gets some crunch.
- Bake until golden and bubbling:
- Slide the dish into the oven uncovered and bake for about 25 minutes, until you see golden brown spots on top and the sauce is bubbling around the edges.
- Rest and garnish:
- Let it sit for 5 minutes after removing from the oven so the sauce can settle, then scatter fresh parsley over the top before serving.
 Save to Pinterest
 The first time I served this to my family, my teenage son went quiet after his first bite and then simply said this is the one. That dish has since become the meal I make when someone needs taking care of without anyone having to ask.
Serving Ideas That Actually Work
A simple green salad with a tangy vinaigrette is the perfect side because it cuts through the richness of all that butter and cheese. Steamed green beans or roasted asparagus also work beautifully if you want something warm beside it.
Swaps and Shortcuts
Chicken thighs work just as well as breasts and actually stay juicier if you are worried about overcooking. You can also tuck a layer of shredded mozzarella or Gruyere between the chicken and the topping for an extra indulgent version that guests always rave about.
Storing and Reheating Leftovers
Cover the baking dish tightly with foil and refrigerate for up to three days, though in my house it never lasts that long. When reheating, stick it in a 350 degree oven for about 15 minutes rather than using the microwave so the topping stays crispy instead of turning soggy.
- Freeze individual portions in airtight containers for up to two months if you want to stock up.
- Add a fresh sprinkle of panko on top before reheating to bring back some of that original crunch.
- Remember that the sauce will thicken as it sits, so a splash of broth when reheating helps loosen it up.
 Save to Pinterest
 Some recipes are just dinner, but this one feels like a reason to gather around the table a little longer. Keep it in your back pocket for any night that calls for something warm, buttery, and deeply satisfying.
Recipe Questions & Answers
- → Can I use chicken thighs instead of breasts?
-
Yes, boneless, skinless chicken thighs work wonderfully in this casserole. They remain juicier and more forgiving during baking. Simply cut them into bite-sized pieces and follow the same sautéing instructions. You may need an extra minute or two in the skillet since thighs are slightly thicker.
- → How do I store and reheat leftovers?
-
Store leftovers in an airtight container in the refrigerator for up to 3 days. To reheat, cover the casserole with foil and warm in a 350°F oven for about 15–20 minutes, or microwave individual portions until heated through. The topping may lose some crunch, but a quick blast under the broiler for 1–2 minutes can help restore it.
- → Can I assemble this casserole ahead of time?
-
Absolutely. You can prepare the garlic-herb butter and sauce, cook the chicken, and assemble the entire casserole up to 24 hours in advance. Cover and refrigerate, then add the breadcrumb topping just before baking. You may need to add 5–10 extra minutes to the baking time if going straight from the refrigerator.
- → What can I substitute for panko breadcrumbs?
-
Regular breadcrumbs work fine if panko isn't available. For a gluten-free alternative, crushed rice crackers, almond flour mixed with a bit of Parmesan, or gluten-free panko are all excellent choices. Crushed cornflakes also create a satisfyingly crunchy topping.
- → What sides pair well with this casserole?
-
Steamed green beans, roasted asparagus, or a simple mixed green salad with vinaigrette complement the richness of the butter sauce beautifully. Mashed potatoes, buttered egg noodles, or steamed rice also work well to soak up the extra sauce.
- → Can I freeze Chicken Kiev Casserole?
-
Yes, you can freeze it before or after baking. For best results, assemble without the topping, wrap tightly in foil, and freeze for up to 2 months. Thaw overnight in the refrigerator, add the breadcrumb topping, and bake as directed. If freezing after baking, portion into individual servings for easier reheating.
