 Save to Pinterest
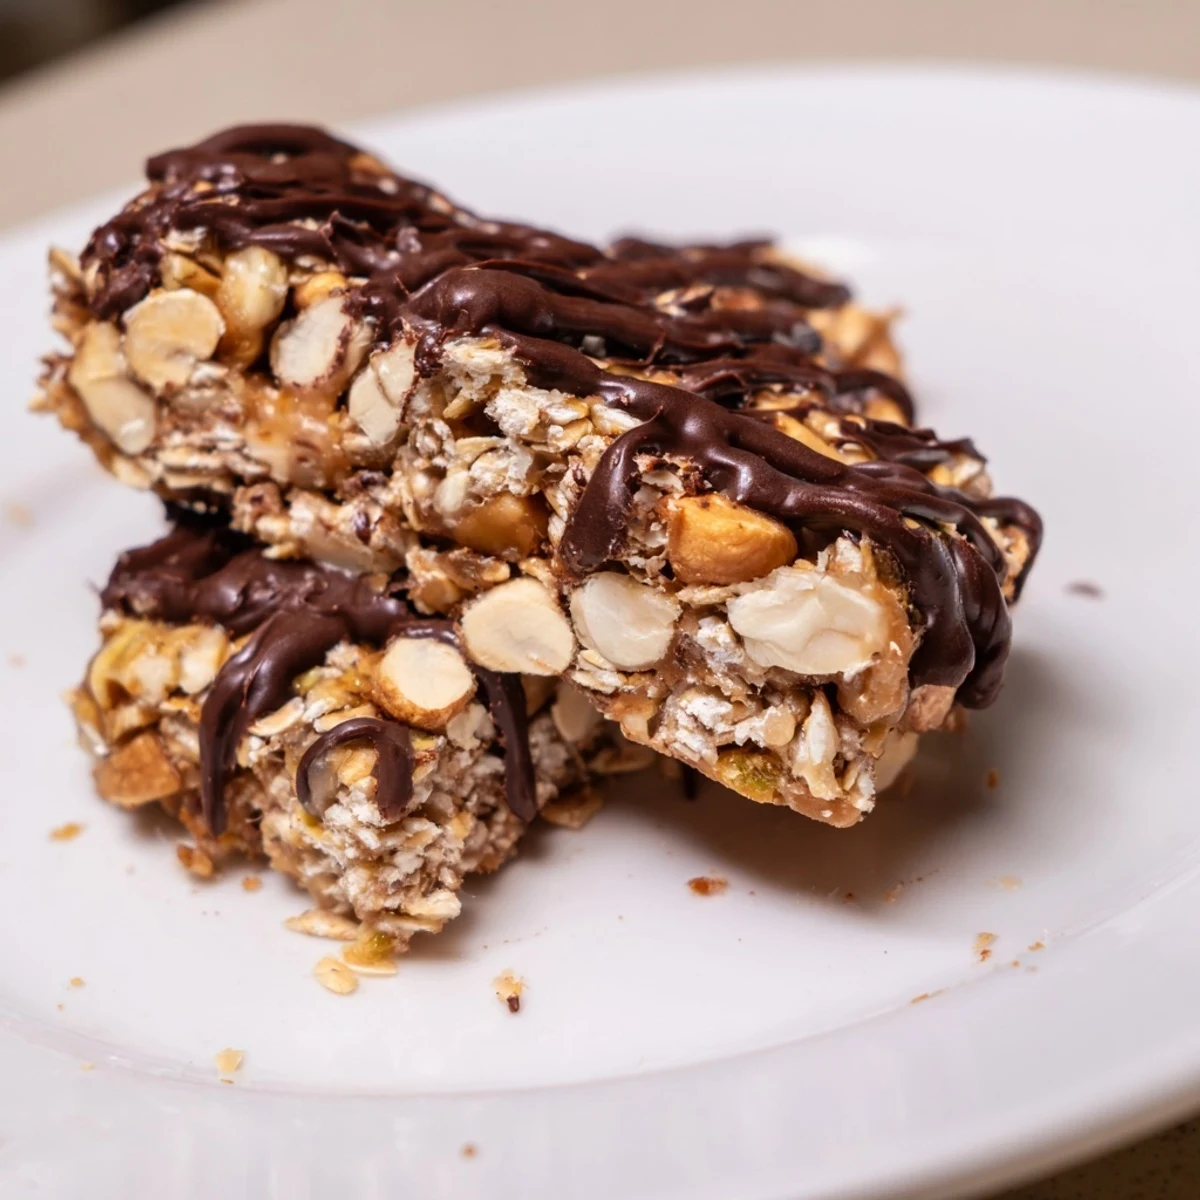
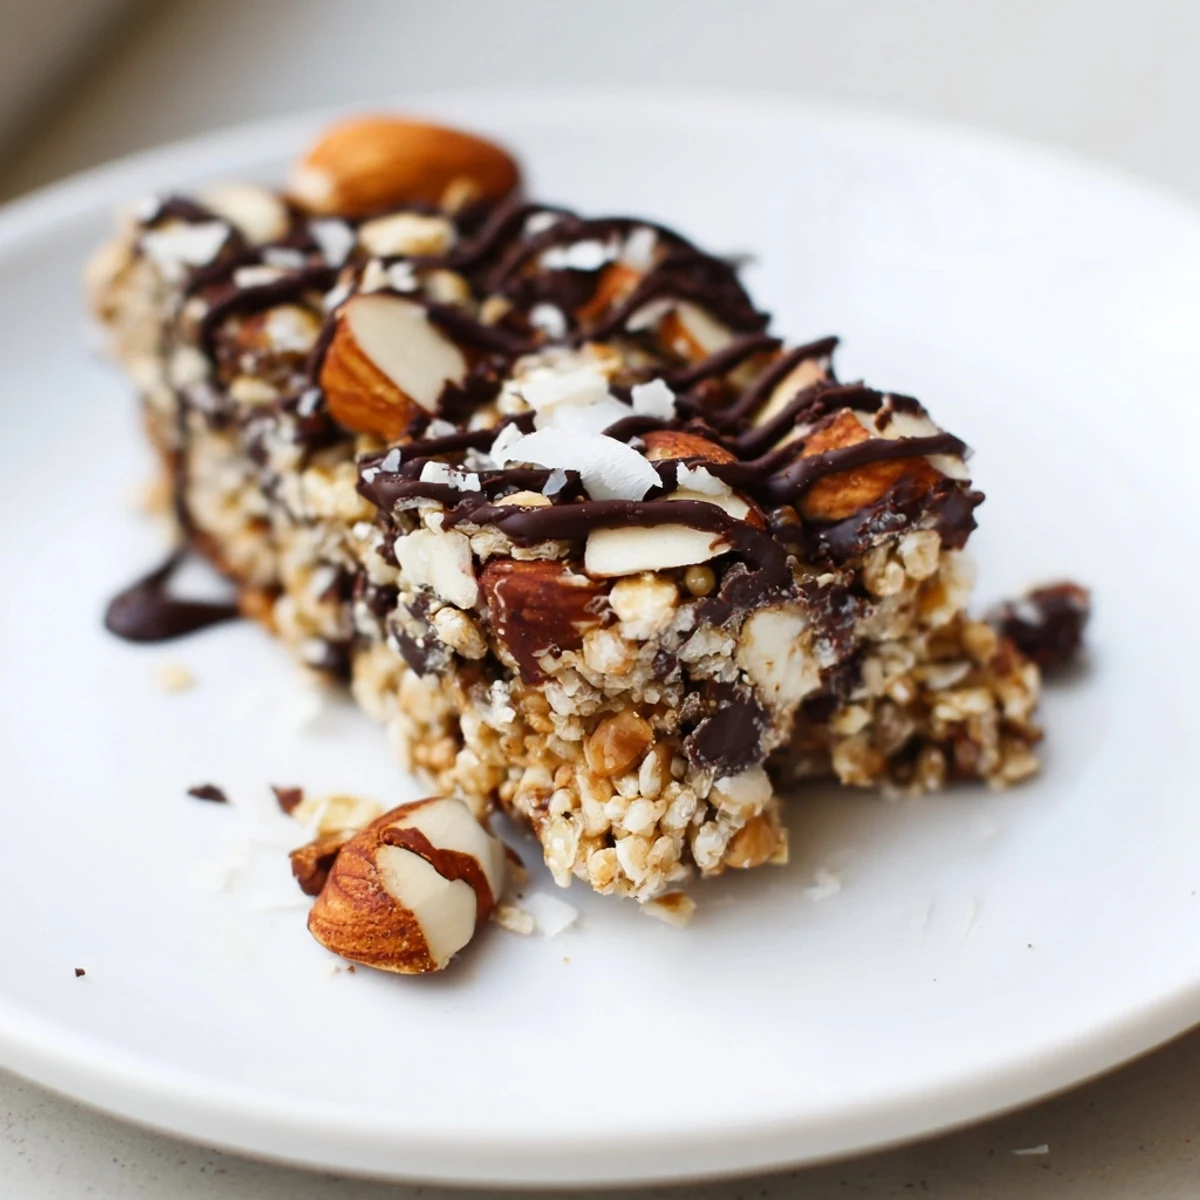
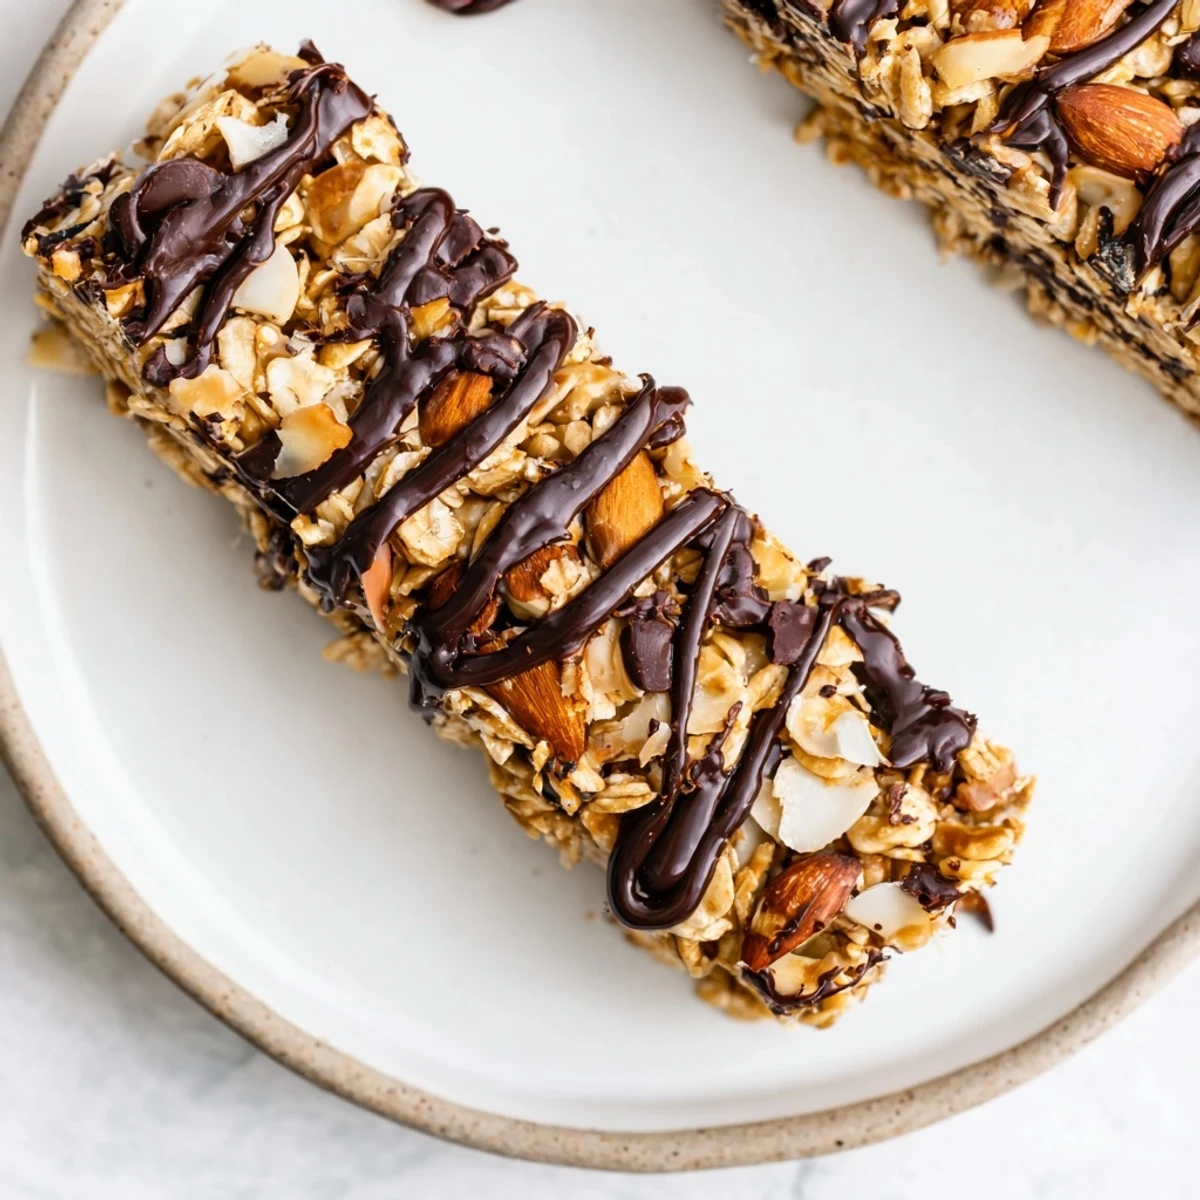
 These chewy bars blend rolled oats, chopped almonds and walnuts, and shredded coconut into a satisfying base. The wet mix of honey, butter, and peanut butter ties everything together, enhanced with vanilla extract. Folded with dark chocolate chips, the mixture is pressed into a pan, chilled, then drizzled with melted dark chocolate for an indulgent finish. Nut substitutions and dried fruit add variety, while refrigeration keeps bars fresh up to a week.
There's something about the smell of melting chocolate mixed with toasted nuts that makes an ordinary Tuesday afternoon feel like a gift to yourself. I discovered these bars on a day when I needed something that was more than just a snack—something that felt intentional, made by my own hands, and actually worth the five minutes it took to devour. The first batch came together almost by accident, but once I tasted that perfect balance of chewy oats, crunchy nuts, and dark chocolate, I knew I'd found something worth repeating.
I made these for a friend who showed up on my doorstep with a terrible week behind them, and watching their eyes light up when they bit through that chocolate layer told me everything. It wasn't fancy or complicated, just real food that came from caring enough to spend fifteen minutes in the kitchen for someone else.
Ingredients
- Rolled oats (2 cups): The foundation that gives you texture and keeps these bars from being too dense—use old-fashioned rolled oats, not instant, because they hold their shape.
- Almonds and walnuts (1/2 cup each, chopped): Toast these lightly if you want more flavor to come through, though raw works fine if you're in a hurry.
- Unsweetened shredded coconut (1/4 cup): This adds a subtle sweetness and keeps the texture interesting without overpowering everything else.
- Honey or maple syrup (1/3 cup): Honey gives you a slightly different flavor than maple, so pick whichever you have on hand.
- Unsalted butter (1/4 cup): Melts easily with the other wet ingredients and keeps these bars from being too dense.
- Creamy peanut butter (1/4 cup): The secret that makes everything stick together smoothly—make sure it's the creamy kind, not chunky.
- Vanilla extract (1 teaspoon): Just enough to brighten everything without making it taste like a dessert.
- Dark chocolate (1 cup chips or chopped, 60-70% cacao): This is where the quality matters most—good chocolate makes the whole thing taste intentional.
- Salt (1/4 teaspoon): A tiny pinch that makes the chocolate taste deeper and richer.
Instructions
- Set up your pan:
- Line an 8x8-inch pan with parchment paper, letting it hang over the edges so you can lift the whole thing out later without struggling. This is the moment that saves you about five minutes of frustration.
- Mix your dry team:
- Toss the oats, almonds, walnuts, coconut, and salt together in a large bowl until they're evenly distributed. This small step means you won't end up with a nutty bottom and plain top.
- Melt the sticky stuff:
- Heat the honey, butter, and peanut butter together in a small saucepan over medium heat, stirring constantly until it's smooth and glossy. Once it is, remove from heat and stir in the vanilla—the whole thing takes about three minutes.
- Bring it all together:
- Pour the warm wet mixture over your dry ingredients and stir until every oat is coated and nothing looks dry. You'll feel it coming together, and it should look like a thick, chunky paste.
- Fold in half the chocolate:
- Add half the chocolate chips and fold them in gently—you want them distributed but not completely melted into everything. Save the other half for the top, where it looks beautiful and melts on your tongue.
- Press into the pan:
- Transfer the mixture to your prepared pan and press it down firmly and evenly with the back of a spatula or your hands. Spend a little extra time on this step because a compact bar holds together better.
- Top with chocolate:
- Melt the remaining chocolate in the microwave in 30-second bursts, stirring between each one, or use a double boiler if you prefer. Drizzle it over the top and let it set slightly before the next step.
- Chill and set:
- Pop the whole pan into the refrigerator for at least an hour, though overnight is even better if you can wait. The cold is what transforms this from a sticky mixture into something with actual structure.
- Cut and serve:
- Use the parchment overhang to lift the whole thing out, then slice it into twelve bars with a sharp knife—wipe the blade between cuts for clean edges.
 Save to Pinterest
 What surprised me most was how these became the thing people texted me about, not because they were fancy, but because they tasted like something made with actual intention. That's when I realized a snack bar could mean something more than just convenience.
Flavor Combinations to Try
Once you've made these once, the possibilities start appearing in your head. I've added dried cranberries instead of some of the nuts for a tart edge, swapped the peanut butter for almond butter when I wanted something slightly more refined, and even tried using white chocolate on top just to see what would happen. The magic is that the base recipe is solid enough to play with, but straightforward enough that you won't ruin it by experimenting.
Storage and Making Ahead
These bars live happily in an airtight container in the refrigerator for up to a week, which makes them perfect for Sunday afternoon prep when you know the week ahead will be chaotic. I've also frozen them successfully for up to three weeks—just layer them between parchment paper so they don't stick together. Pull one out the night before and it thaws beautifully, or eat them straight from the freezer if you like them extra cold and chewy.
Customizing for Your Crowd
The beauty of this recipe is how easily it bends to who you're feeding. For a nut-free version, swap the almonds and walnuts for sunflower or pumpkin seeds and use sunflower seed butter instead of peanut butter—it works equally well. I've made them with extra coconut for someone who loves tropical flavors, and they've gone out the door with raisins stirred in for someone else entirely.
- Check your chocolate label for allergens if anyone has sensitivities, because some brands process nuts or dairy in their facilities.
- The texture stays best if you keep these cold, so don't try storing them at room temperature no matter how convenient it sounds.
- If you're making these for a specific person, remember that a homemade snack bar says you were thinking about them, which matters more than perfection.
 Save to Pinterest
 These bars are proof that the best snacks are the ones you make yourself, not because they're complicated, but because they're intentional. Keep a batch in the refrigerator and you'll find yourself reaching for them at three o'clock, at the end of a long day, or right before you need a little boost.
Recipe Questions & Answers
- → What nuts are included in these bars?
-
Chopped almonds and walnuts add crunchy texture and nutty flavor to the bars.
- → Can this be made without nuts?
-
Yes, substituting with sunflower or pumpkin seeds and using sunflower seed butter creates a nut-free alternative.
- → How do I achieve the chewy texture?
-
The combination of oats, nut butters, and honey ensures a moist and chewy consistency after chilling.
- → What role does the dark chocolate play?
-
Dark chocolate chips are mixed in and drizzled on top, offering rich flavor and contrast to the nutty base.
- → How long should the bars chill?
-
Refrigerate the bars for at least 1 hour to firm up before slicing and serving.
- → Are these bars suitable for vegetarian diets?
-
Yes, these bars use vegetarian-friendly ingredients like oats, nuts, butter, and honey.
